Build an app with AppInstitute’s app builder & PrinterCo’s receipt printer

In this tutorial, we’ll go through how to use AppInstitute’s app builder to create an online ordering system for restaurants. We’ll then connect a receipt printer for online orders to print wirelessly.
Prerequisites:
To complete this tutorial, please email support@printerco.net to get your printer email address.
You’ll also need to set up your receipt printer. Be sure to check out How to set-up the TPS900 printer to ensure this is done correctly!
Let’s Get Started!
Step 1 – Sign up to AppInstitute’s app builder platform
- Head over to https://cms.appinstitute.com and sign up for free to begin building your app.
- You’ll be able to build and test your app for free. However, after the free trial period is over, you may need to upgrade to a subscription package to continue using the service.
- More details on pricing can be found here
Step 2 – Select a pre-built app template
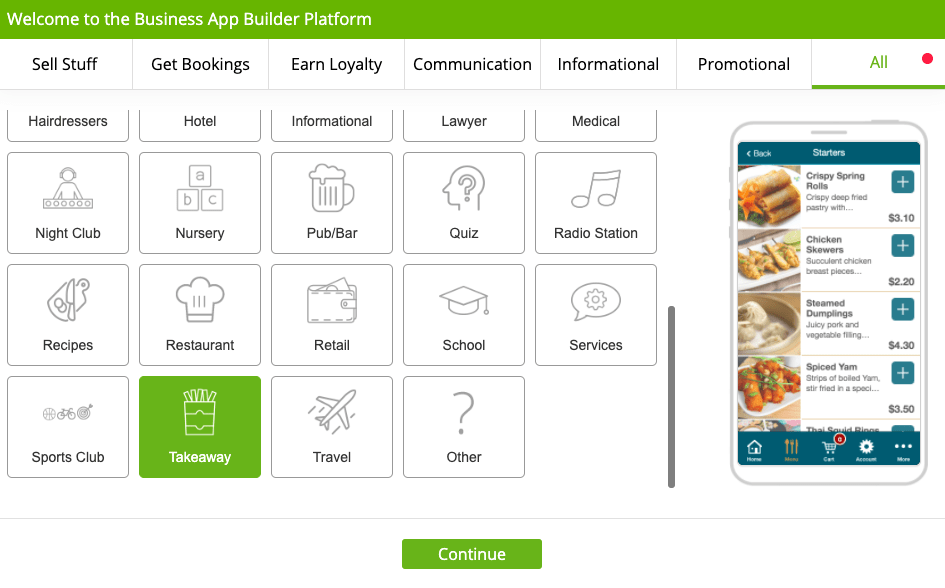
- AppInstitute has a wide selection of pre-built templates for your app.
- Select a template that is suitable for your business and click continue.

STEP-2
Step 3 – Select a color scheme
- AppInstitute has a very nifty tool to speed up the design process of your app. Simply enter your website URL and AppInstitute will analyze your color scheme and copy it into your app.
- Although this step is completely optional, it helps to create a seamless design that aligns with your website. Highly recommended if already have a website.

STEP-3
Step 4 – Complete account set-up
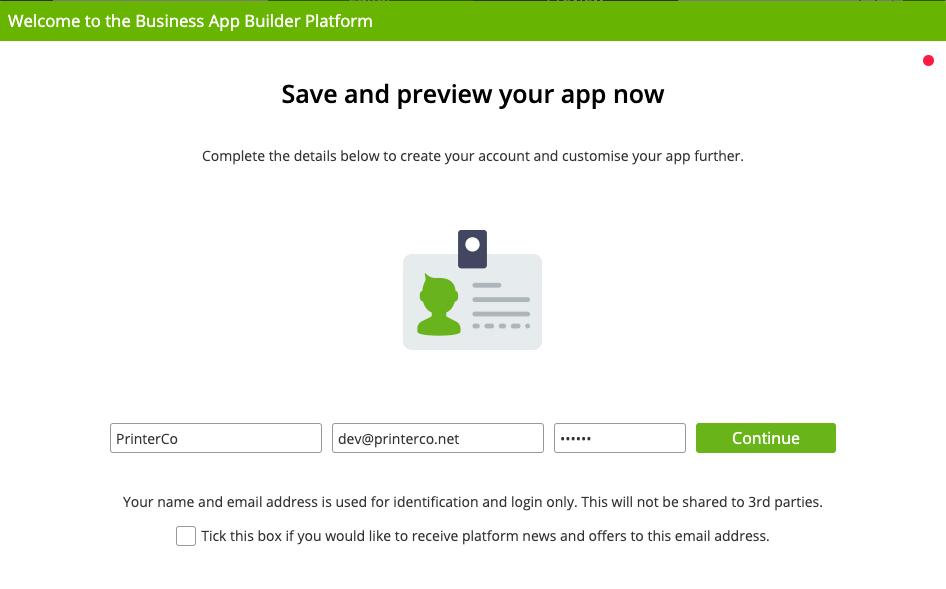
- To complete your account set-up and start building your app, enter your name, email and password.

STEP-4
Step 5 – Build your app
- You will now be taken to AppInstitute’s app builder.
- While in the ‘Editor’ view you can further customize your app. Change colors, text, and buttons.
- If you need to come back to this page, just click on ‘Build’ from the left navigation, and then ‘Theme’.

STEP-5
Step 6 – Configure your printer email address
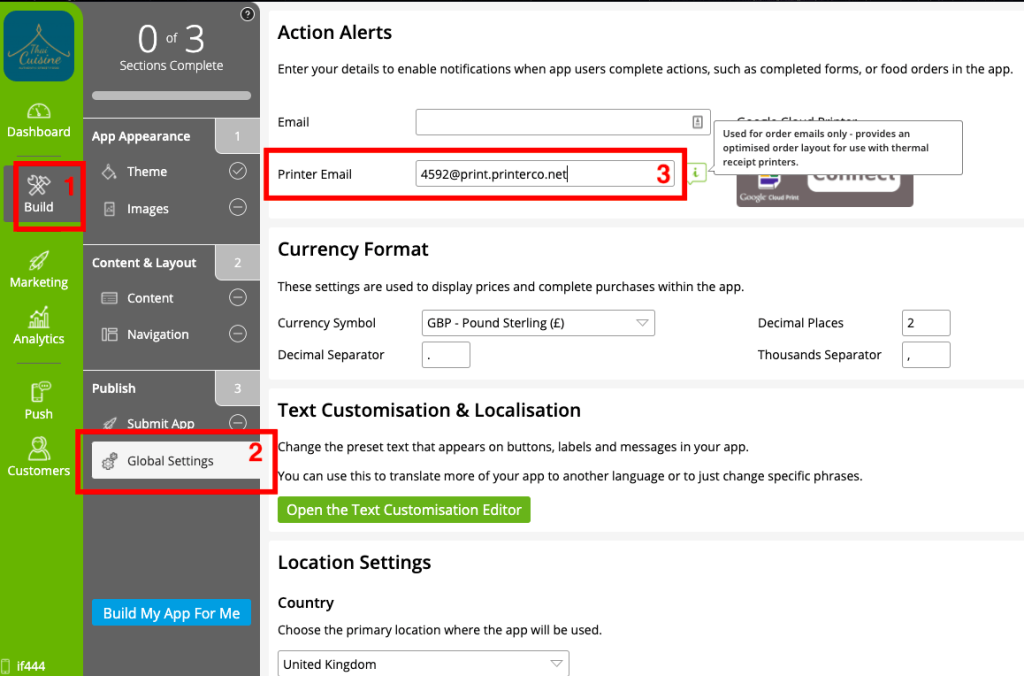
- Navigate to Build > Global Settings.
- In the ‘Printer Email’ field, enter the email address associated with your printer.
- If you haven’t already done so, please contact us at support@printerco.net to generate your unique printer email address.
- The email order will be sent to our dedicated server (print.printerco.net) to be converted to a format suitable for printing.

STEP-6
Step 7 – Send a test order
- Navigate to Build > Theme > Preview.
- Navigate through your app to place a test order.
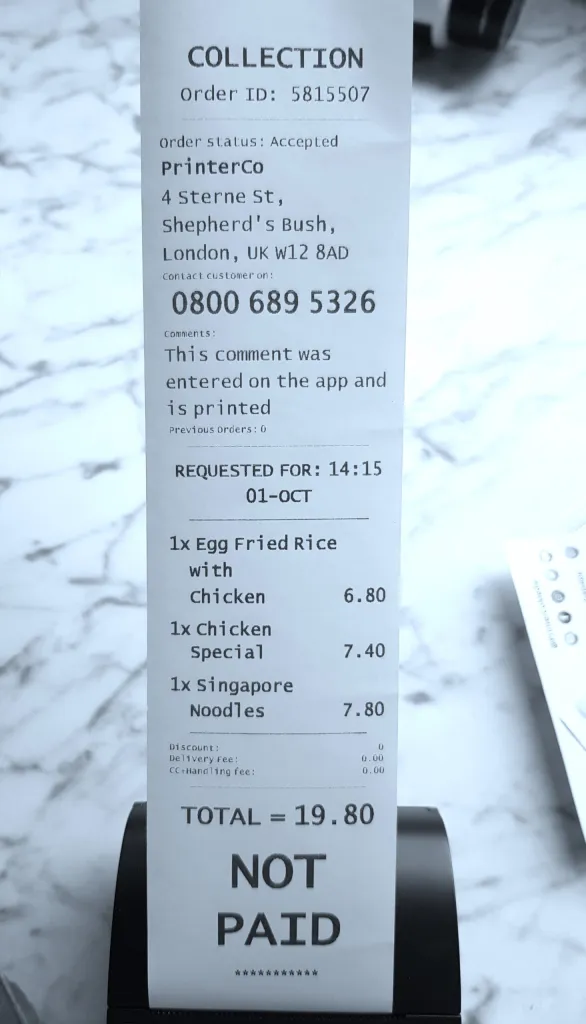
- Your PrinterCo receipt printer will now print the order within 30 seconds and will look like the sample receipt below.

STEP-7
Your receipt printer is now ready!
After you’ve followed the instructions above, your app built by AppInstitute should now be ready to go. We recommend sending several test orders from the app builder in preview mode before going live.
If you’ve found that orders are not printing, then make sure to check the WatchDog to see if you’ve missed anything.
If you need help with your PrinterCo receipt printer, feel free to contact our support team. You can email support@printerco.net or reach us via live chat.
